.
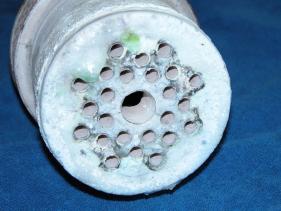
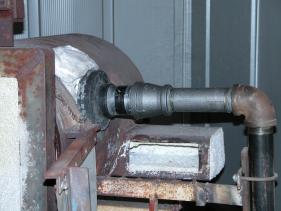
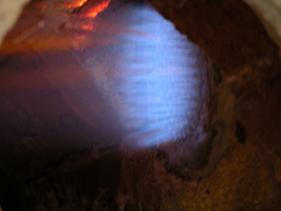
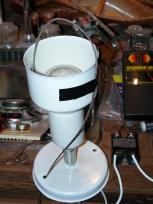
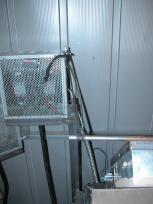
Replaced the existing glory hole burner head (Gibberson 650) with a Gibbeau burner head. The new burner tip has a much shorter flame length (8" vs. 20") and heats the glory hole much quicker.
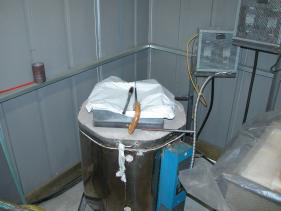
Quick furnace shut-down for lid maintenance. The furnace was turned off on April 29 and allowed to cool. Once cooled to about 150F, I covered the crucible and painted cement onto some broken sections of the maintenance lid. I also removed some damage to the gathering lid and painted cement over the area. Once dry, the furnace was again turned on and back at full temperature by May 4.
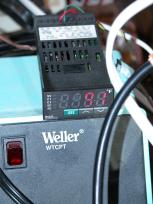
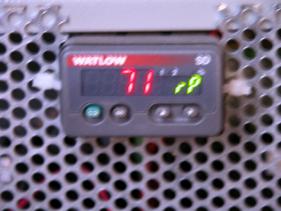
Yesterday I replaced the furnace Watlow controller with my second Fuji controller. I waited until after I finished blowing, and before I started charging (in case anything went wrong, I'd only cool the empty pot). The exchange went perfectly. After starting the furnace again, the controller took a while to auto-tune this will actually take a day or two as the new controller "gets the feel" for the furnace.
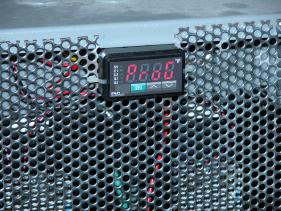
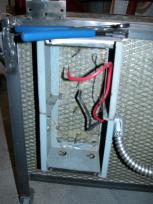
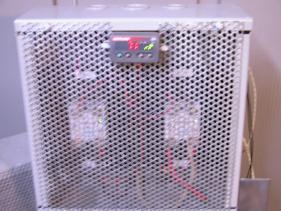
To speed up the exchange, I pre-programmed the controller before installing it, as I had done with the annealer controller. Here's a picture of both controllers doing their thing.
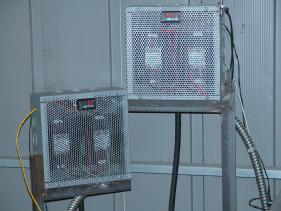
April 10, and I wanted to blow glass. The cranky Watlow had been working OK in the annealer, but the time had come to get it in for warranty service. Besides, after playing with my "EZ-BAKE" setup, I had the new Fuji controller all programmend and ready to go.
These pictures show the old controller, the new controller and the annealer already over 200F.
In March, one of my Watlow 1/32 DIN controllers started giving trouble. First one whole segment of the display died, then the thing cut out on my furnace (luckily I caught it after only an hour and got it working again).
I sought recommendations on cheap controllers from various places, and finally decided upon the Fuji PXR-3 series controller. For 1/2 the cost of a similar Watlow (and $50 less than my current Watlows), I got a controller with programming (8 ramp/soak points in one or two groups) plus RS485 control/communications.
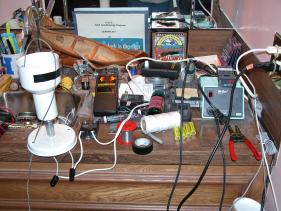
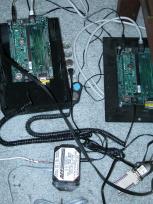
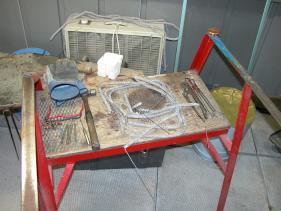
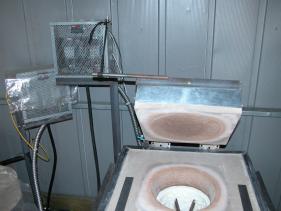
Once they arrived last week, I set them up just to test them out. Yesterday, the RS232-RS485 communications module arrived, so today I build what can only be described as an "EZ-BAKE OVEN".
One lightbulb, one type-K thermocouple, one controller, one communications conversion module and my PC.
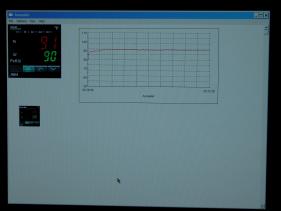
I've been having fun all day learning the parameters of this thing. I currently have the "oven" simulating a complete annealing cycle (at lower temps, of course).
I will say this - using the PC to view/control/log the controller is about 1000X easier than trying to figure out the control's own buttons and stuff.
Next stop, replacing the flakey Watlow currently residing in the annealer.
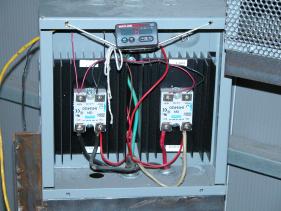
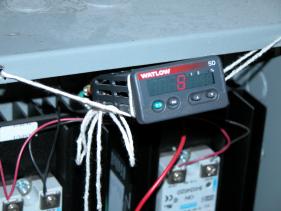
Here are some pictures showing the overall setup, the "oven", the Fuji PXR3 controller, the RS232-RS485 communications converter, and the PC control/display software.
On March 21 the elements died during a charge cycle. The furnace took until March 25 to cool, and then came the task of replacing the elements. Once cold, it was discovered that some batch found it's way under the maintenance lid, eating a hole. There was also some glass damage to the gathering lid.
The maintenance lid was repaired by cutting out the damaged sections and cementing new brick in place (not whole bricks). Then the gathering hole was recut and the lid cemented. For the gathering lid, the damaged cement was removed and replaced with new cement.
The elements died because the coils were too close together. Optimum stretch for an element is about 3:1, and the old elements were less than 1.5:1. In some places, the coils were touching - these were the places where the element burned out. To increase stretch, I decided to double the element grooves in the bricks. This doubles the element stretch. I also decided to increase the element size from 15Ga. to 14Ga, also extending element life.
These pictures show the maintenance process.


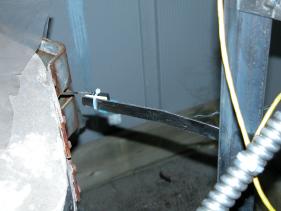
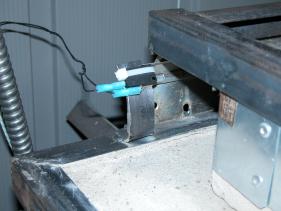
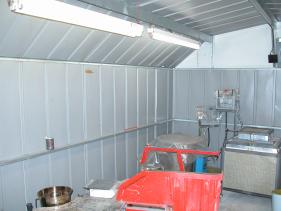
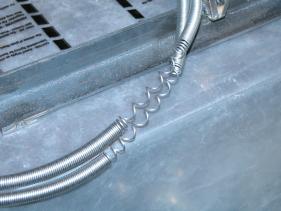
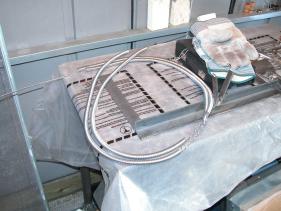
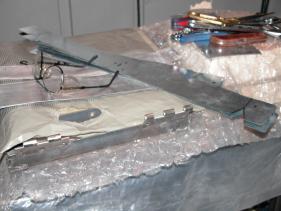
Another cold spell, but then milder weather. On February 7 & 8, I welded up some lid switches for the annealer and the furnace, plus made an auxiliary yoke for the main yoke (so someone can be heating a bit while the main piece is in the glory hole). I also moved the double fluorescent light from the center of the roof to the back side, so it's out of the heat that gathers at the peak. The lid "hold open" is just a shoelace with a metal ring (from an old computer hard drive) which is placed over a metal pin to hold the lid open. Simple, but effective.
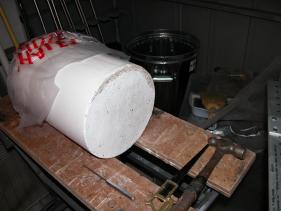
On February 8, I also replaced the crucible and added fibre to seal the gaps in the alumina (from shrinkage due to the heat). Once done, I heated the crucible slowly (50F/hr) to 212F. On February 9, I started ramping the furnace back up to temperature in preparation for charging and blowing.
These pictures show the two lid switches, the fancy furnace lid "hold open" and the light in it's new location.
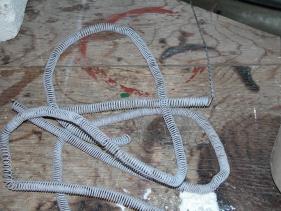
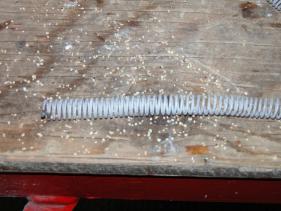
Just after January 23, the temperature here in Calgary dropped to between -25C and -32C for a week or so. Today was one of the first nice days (-20C) in a while. Consequently, I went out to the studio with my multimeter to check over the elements. Using the probe, I determined that the lower element was broken about 4 inches from the lower element entry point, exactly in the area where I changed the bricks during the meltdown maintenance.
After removing and examining the old element, it seems that it broke in two spots, probably from my bending it to remove and replace the damaged bricks.
I replaced both elements just to be safe. The whole procedure took about 2 1/2 hours total, including the time to diagnose the broken element with the multimeter. The furnace is once again back together, and holding 75F.
Since it's still very cold out, I'm warming the crucible to 75F inside the house before returning it to the furnace. Some grog to catch spills, and some fibre to fill gaps in the alumina board caused by contraction and I'm back in business!


After the first successful charging of the furnace, we used about 1/2 of the glass during the first Tin Shack Blowdown, on January 14. 2004. After the blowdown, I let the furnace idle at 1910F until January 18, when I blew a couple of vessles (see the glassware link). By then the crucible was down to about 1/3 full or a bit less. Again I let the furnace idle at 1910.
On January 20, I heated the furnace to 2150 to begin recharging with batch. The furnace heated as expected, but shortly after adding batch (to just under the lip), the temperature started to drop, and the relays came on full. The temperature continued to drop as I monitored it, and by the time it reached 2100F (in about 5 minutes), I knew I had a problem
I immediately started scooping the batch back out of the furnace, and managed to remove 80%+ of it into a stainless bucket. This was only made possible by the use of a Gott CoolSleeve, which Allan Gott had brought for me the night of the blowdown. This sleeve allowed me to prop the gathering port lid open and repeatedly put my hand and arm (wearing an insulated leather work glove) into the crucible to scoop and remove the batch (with my little charging scoop). I probably removed about 25lbs. of batch from the crucible that way. I had to dip the leather glove in cold water several times to keep it from catching fire, but the Gott CoolSleeve never even got warm!!!
In my opinion, if you deal with hot glass in any way, you really owe it to yourself to purchase and use a Gott CoolSleeve. This product will allow you to work in close proximity to seriously hot glass without discomfort. It's use when gathering and charging routinely saves me from the first degree burns I used to get before switching to the sleeve for protection. Check out Allan's site for more information or to purchase. Tell 'em the Tin Shack sent you!!!
After removing the batch, I used a punty to scoop and remove as much of the remaining glass as I could, until the low temperature (1900F) prevented any further gathering. All in all, I removed all but 1" of glass from the crucible, plus a bit of batch stuck to the side walls.
After that, I let the furnace cool on the controlled cooling cycle (100F/hr) to 1200F. I wanted to see if it could hold any temperature, or whether the elements were totally dead. As it turned out, it held 1200F for two hours without difficulty - even the digital relays were firing normally again. I gradually cooled the furnace through the quartz inversion to 900F, then let it cool at it's own pace to room temperature. The final 600 degrees took two full days.
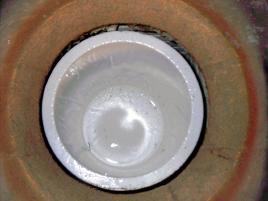
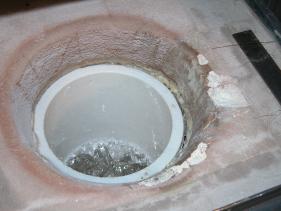
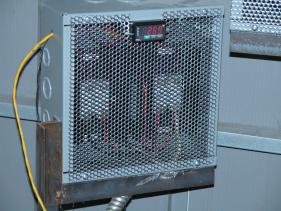
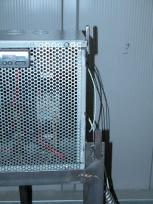
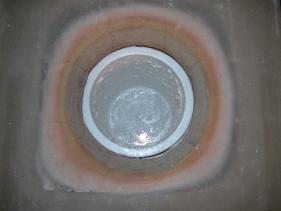
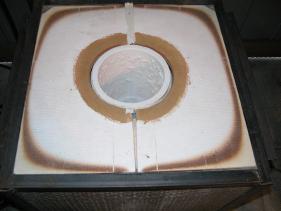
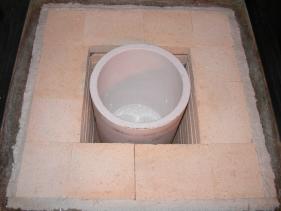
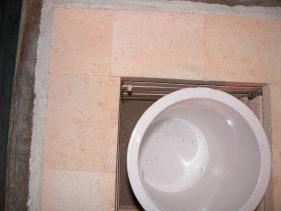
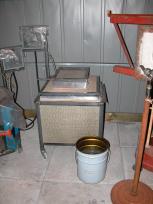
Now that the furnace has cooled, I opened it up, removed the crucible and took these pictures. As you can see, there is no visible damage to the furnace at all. The crucible is a bit "crusty" with partially melted batch, but it should be fine if I ramp it back to temperature very slowly (I'm going to use 50F/hr ramp).
I turned on the elements to test them, and the last (blurry) picture shows clearly that the upper element is working fine, while the lower element is not working at all. A brief check revealed no obvious break, so I will next check all element connections before proceeding. I was surprised that the large sag in the elements where they move between courses of bricks was not the cause of the failure.
More news after tomorrow.
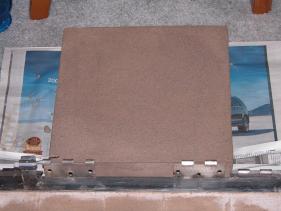
The furnace rebuild is almost complete.
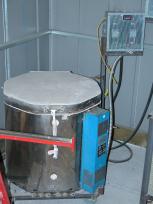
The furnace is back together and heating (holding 75F). Fibre has been used to fill the gaps between crucible and alumina.
Still to do - build the gathering port lid support and mount the lid switch.
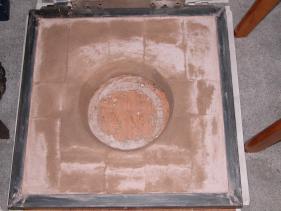
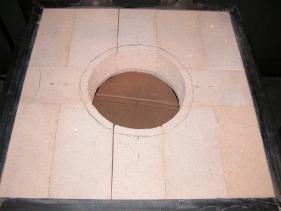
The furnace rebuild is almost complete.
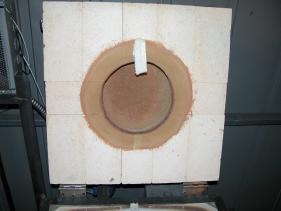
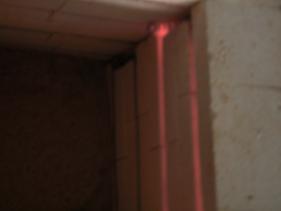
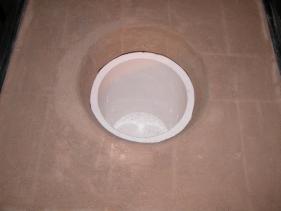
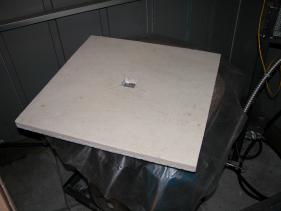
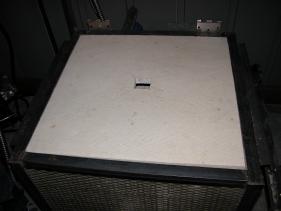
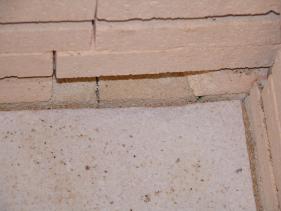
The gathering port opening in the alumina (plivaform) was protected with cement. The maintenance lid was cemented on the upper surface to give it strengh, and the opening was protected with cement. The gathering port lid was given an additional coat of protective cement (the lid remained undamaged from the original build.
The alumina and maintenance lids have been installed, but the gathering port needs some adjustment to make it seal tightly. The fibre above the bricks will be replaced with a thicker layer, and the clamps re-tightened.
Still to do - build the gathering port lid support and mount the lid switch.
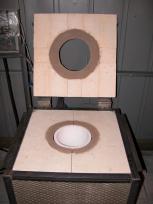

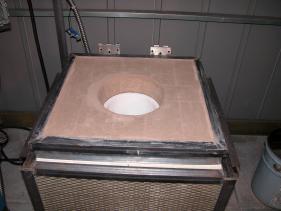
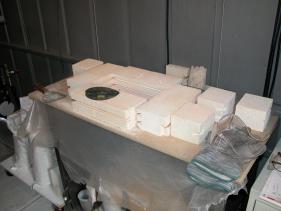
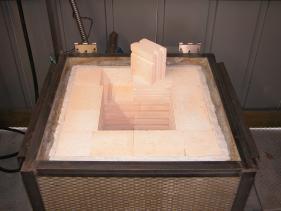
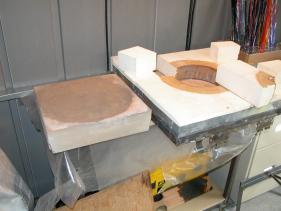
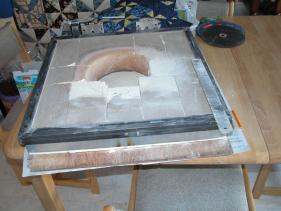
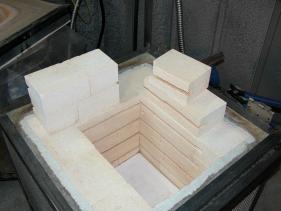
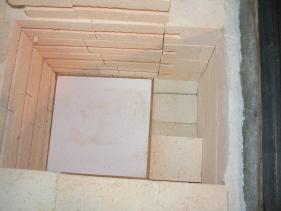
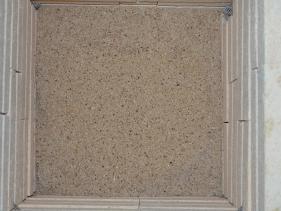
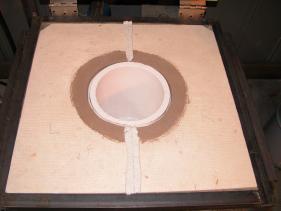
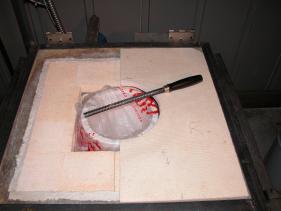
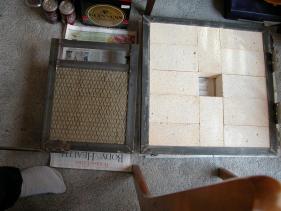
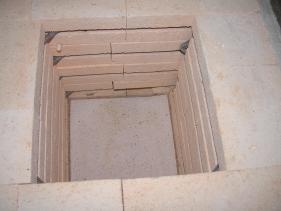
The furnace rebuild is progressing nicely.
The gathering port opening in the alumina (plivaform) was cut yesterday and smoothed, plus the board was split (for expansion). Today I cut the gathering port hole in the maintenance lid and bevelled it. Now I'm coating the top of the maintenance lid with cement (glass protection) as well as the alumina port opening. The crucible is also now in place on the grog in the furnace.
Once the cement has hardened, the lids will be installed. I still need to weld a prop onto the furnace to help keep the gathering port lid propped open when gathering (currently it must be held or it falls backwards). I also have to make a mounting and coupling for the lid switch I have.
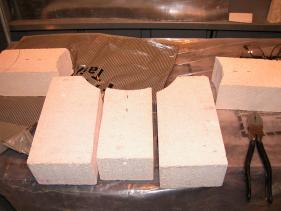
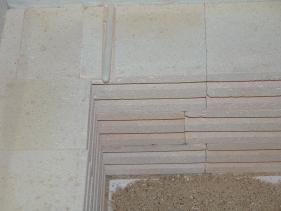
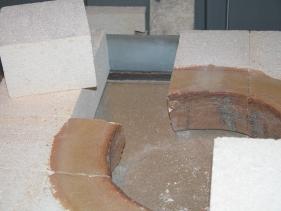
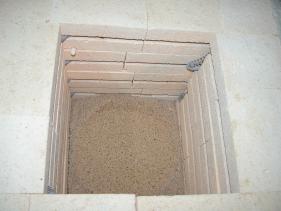
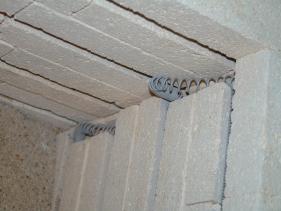
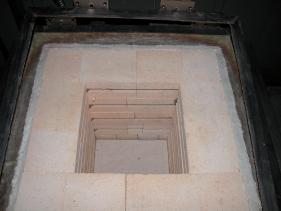
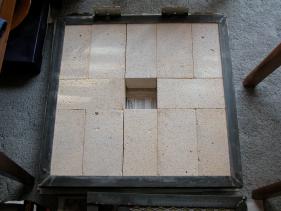
The furnace rebuild has begun.
I've cut, notched and replaced the two damaged bricks in the heading chamber. It was necessary to make an extra cut in the larger brick to allow it to be fitted without disassembling the whole furnace, to protect the elements from damage.
I was able to slip the lower element out of the way, then cut out the damaged bricks and insert the new ones without incident. A brick in the sub-base also needed replacement.
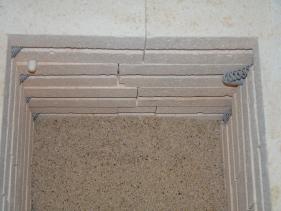
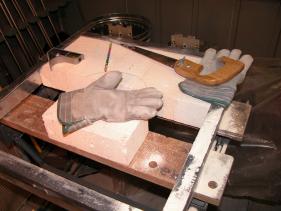
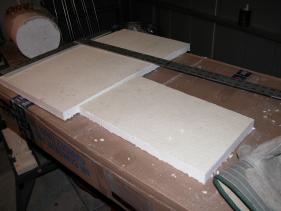
Next, the alumina (this time 'plivaform' from RHI) was cut for the heating chamber lid. The hole for the crucible still needs to be cut, and the board split (for exansion). One of the pieces of alumina under the crucible was also replaced with plivaform.
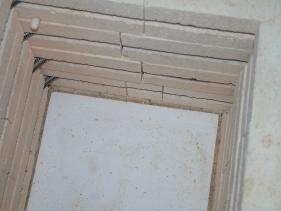
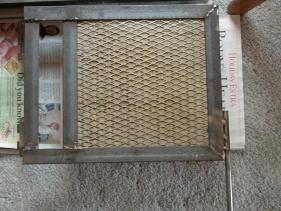
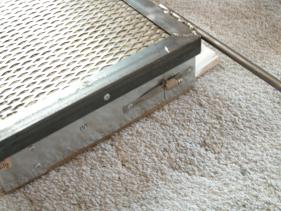
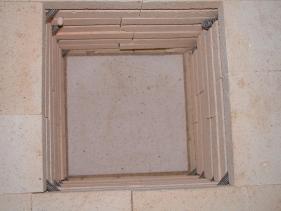
The gathering lid bricks were undamaged, but the metal strips used to hold the bricks was thin aluminum. I decided to use this maintenance time to replace all the aluminum strips with heavier guage metal (26 ga. steel).
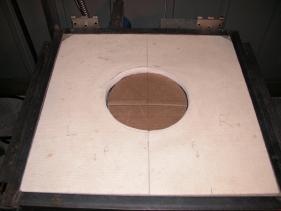
Finally, the maintenance lid needed to be rebuild. All new bricks have been fitted, and the metal bands are in place. The gathering port opening must now be cut and bevelled.
I still need to cut the gathering port openings, and mount the lid switch and a stop bar to prop the lid open when gathering.
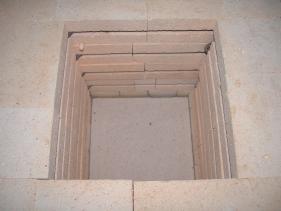
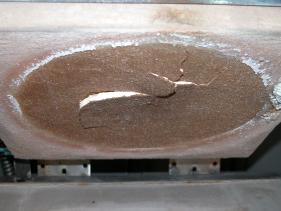
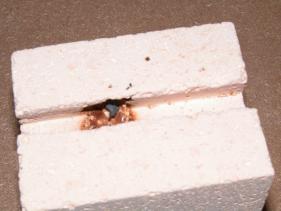
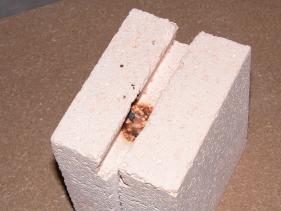
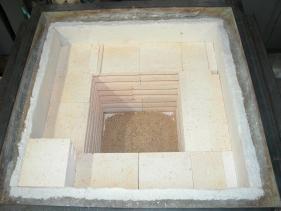
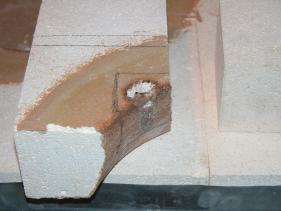
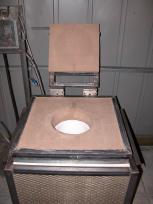
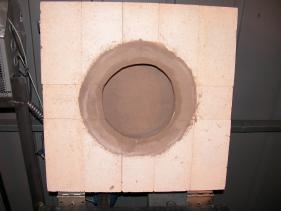
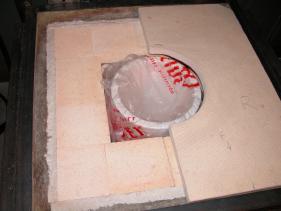
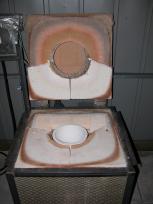
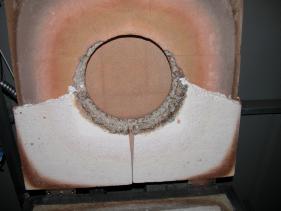
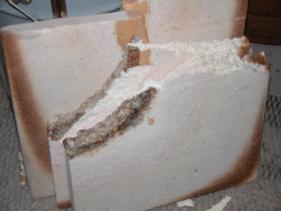
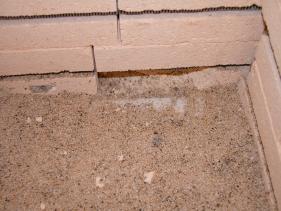
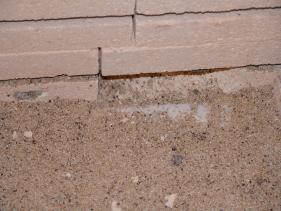
The furnace is now cold, and the analysis has begun.
From the pictures, you can surmise the glass foamed up and ran down the back of the crucible. As it foamed up, it contacted and eroded the bottom of the bricks on the maintenance lid, and the alumina board surrounding the back of the crucible. It flowed down the side of the crucible and into the grog below the crucible. It flowed into the two lowest bricks in the heating chamber, making a 'divot' in one and eroding away the bottom half of the other.
As for damage, the maintenace lid is essentially destroyed. All but two bricks must be replaced. The alumina board is destroyed and must be replaced. The two lowest bricks in the back of the heating chamber must be replaced. The glass/grog stuck to the bottom of the crucible must be removed.
The good news is that I have spare bricks, so the only repair cost will be $75 for new alumina board - and of course repair time. Other good news - the crucible is undamaged, the grog absorbed most of the glass, and the alumina board (suspeced of heat failure) is actually in excellent shape where the glass did not touch it.
The furnace will likely be down until the new year, however. I simply don't have the time right now to fix it.
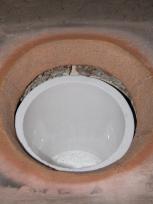
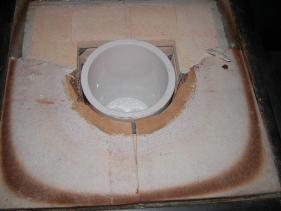
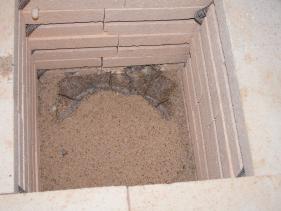
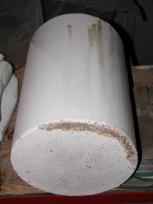
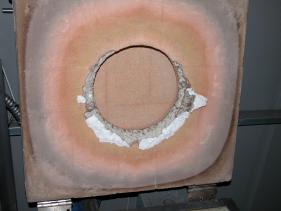
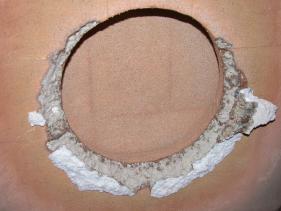
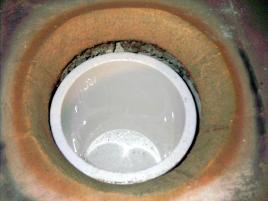
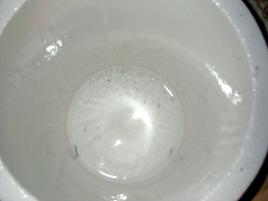
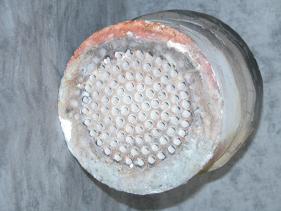
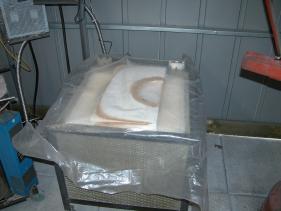
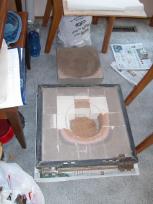
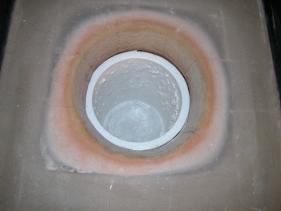
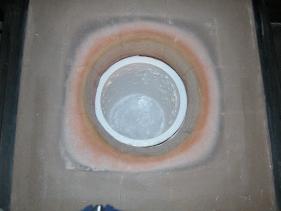
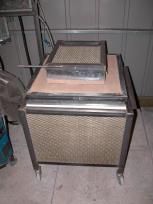
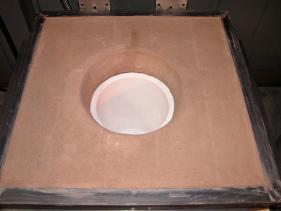
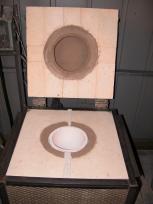
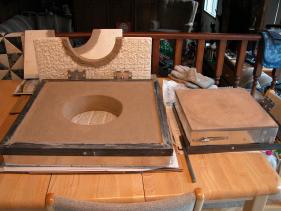
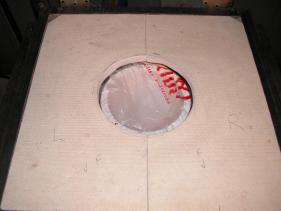
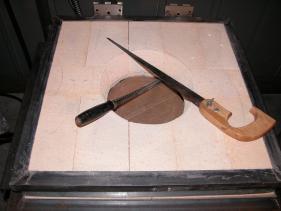
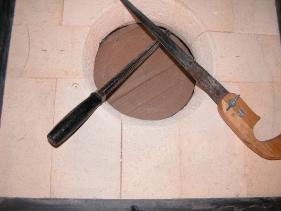
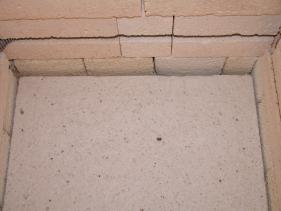
I've been cooling the furnace at 100F per hour since I removed the last of the glass from the crucible on Wednesday (11/26/2003). It took two days to remove the glass, due to the heat it generates (it boiled the water in the receiver vessel several times). By Thursday at 10am, it was 800F, by 10 pm it was 630F. Friday at 10am it was 211F, at which time I took these pictures of the gathering port and crucible.
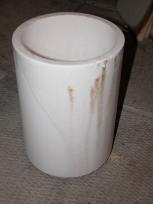
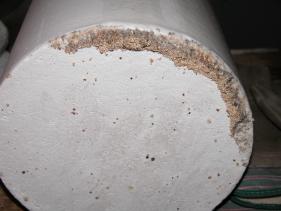
The crucible appears in great shape, with a very thin film of cooled glass everywhere. Some very small cracks appear in the bottom, and there's a dark chunk of "something". Overall, the crucible appears excellent and undamaged.